GCP CSPM
This guide describes how to setup a service user account, and assign roles like Read only access, and Security Reviewer/Audit for TraQez Security Scanner to perform Security Checks, Misconfigurations, Compliance Checks, Asset Inventory discovery, Resource discovery.
Creating Service Account
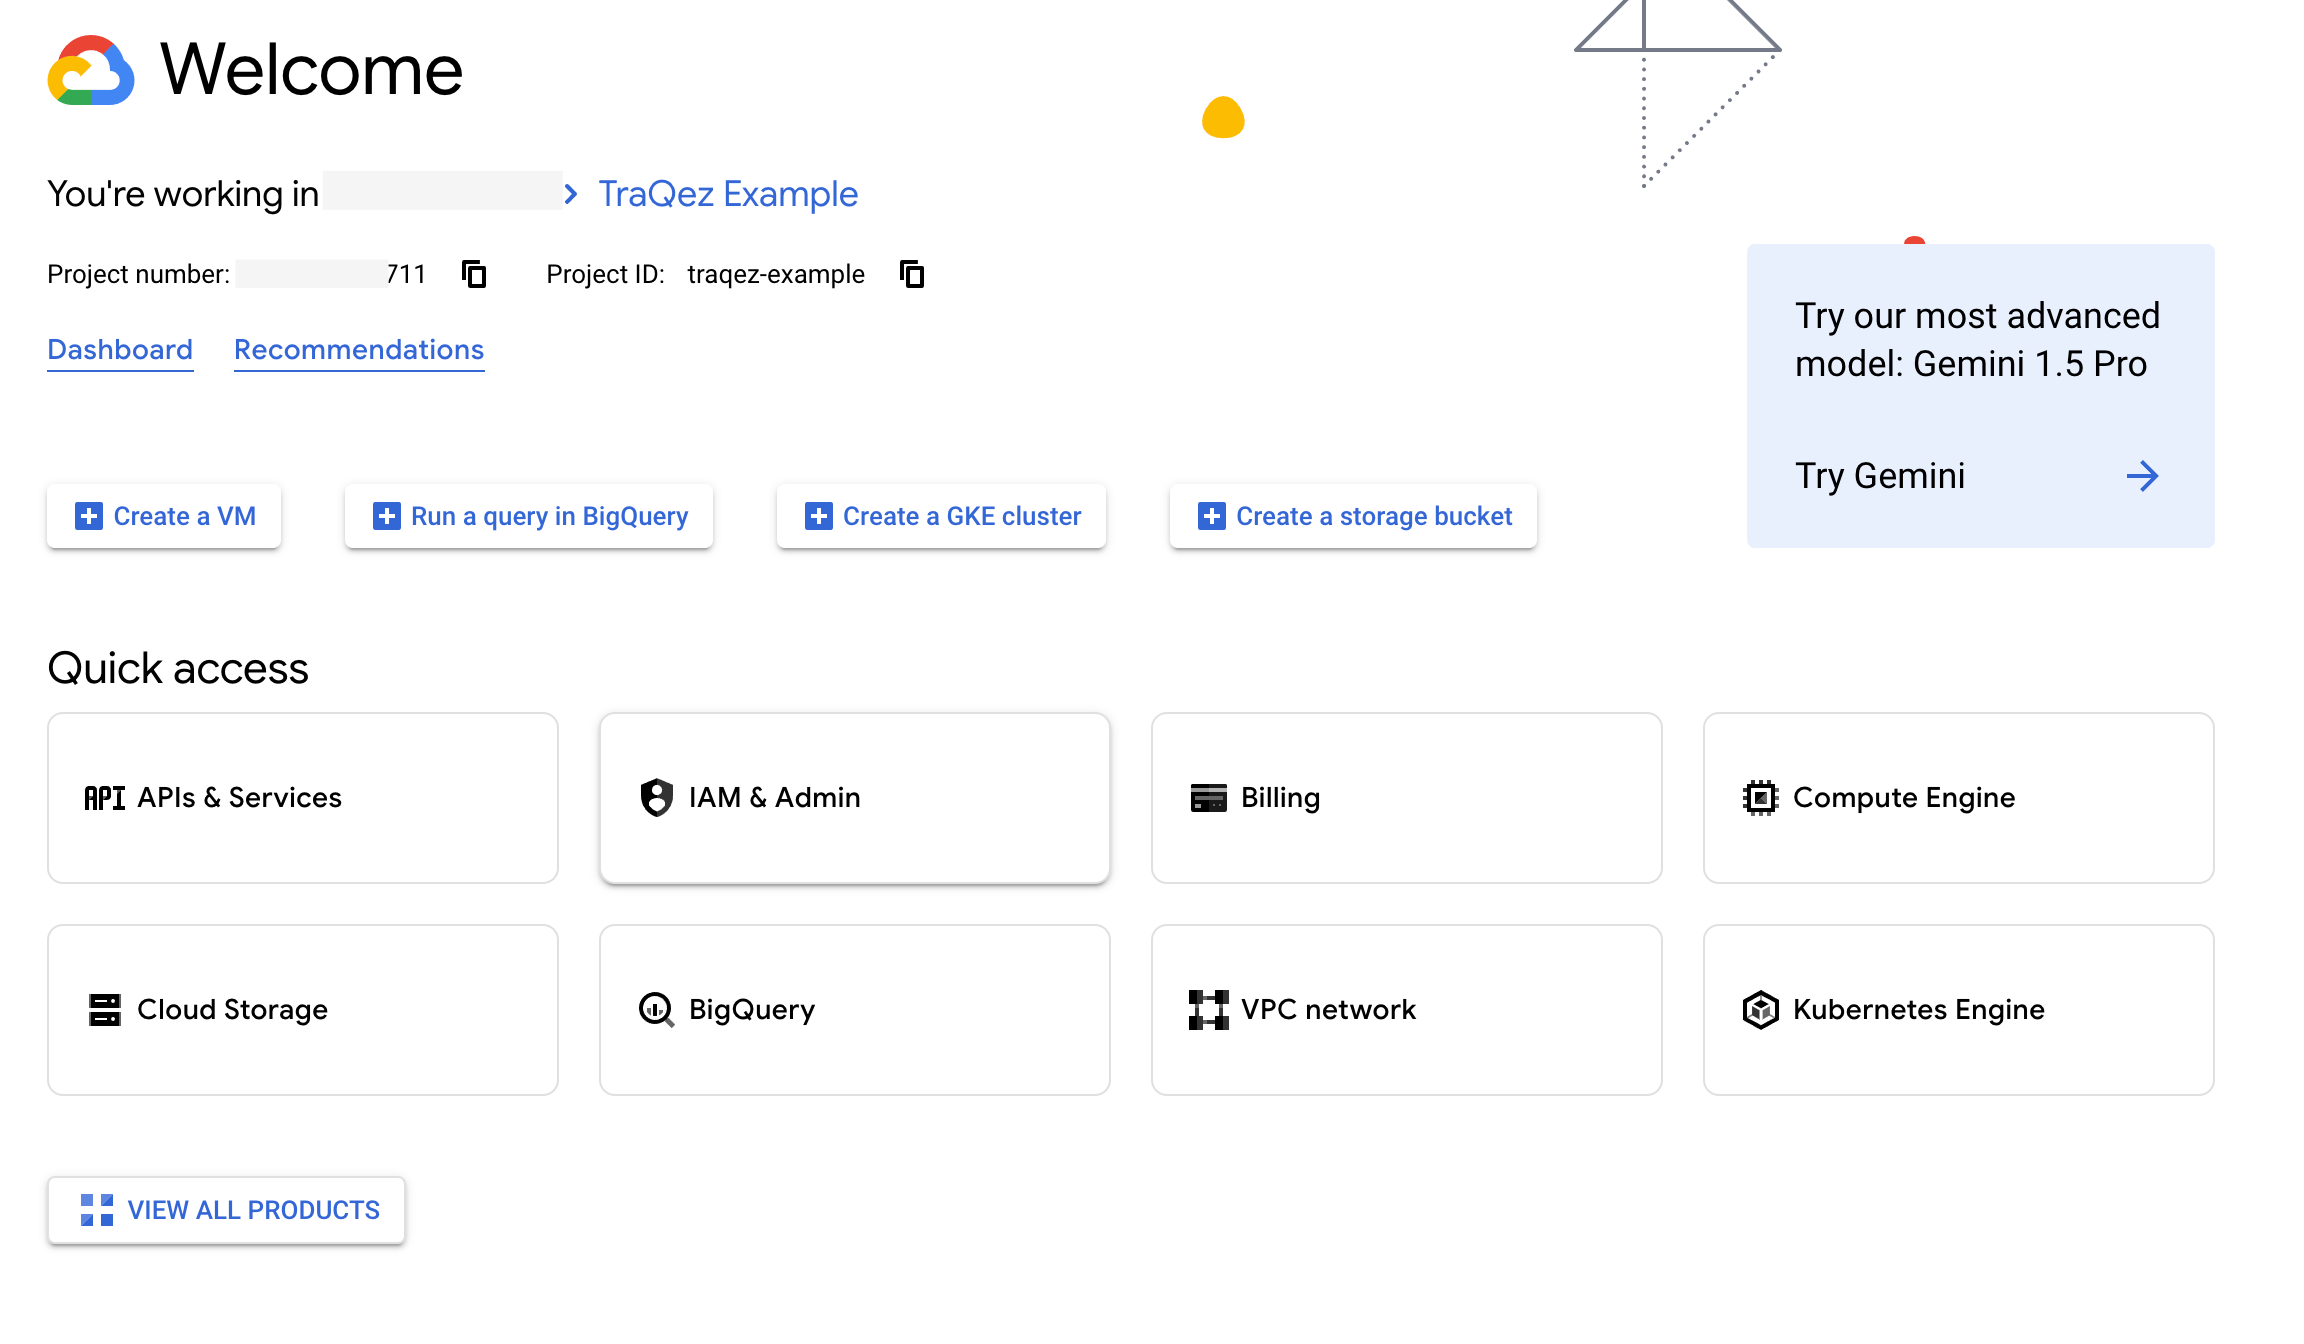
- Login into your Google Cloud Account. Go to Welcome webpage.
- Select the desired Organisation and the project to integrate with TraQez Security Scanner.
- To switch to a different organisation or project, click on the text that indicates your current workspace, which appears as
You're working in [Organisation] > [Project Name]. Eg:You're working in traqez.com > TraQez Example
To view a reference image of welcome page (look for IAM & Admin in quick access and details of project information), click here to expand.
To view a reference image of changing the project/ organisation (popup will appear on clicking project name), click here to expand.
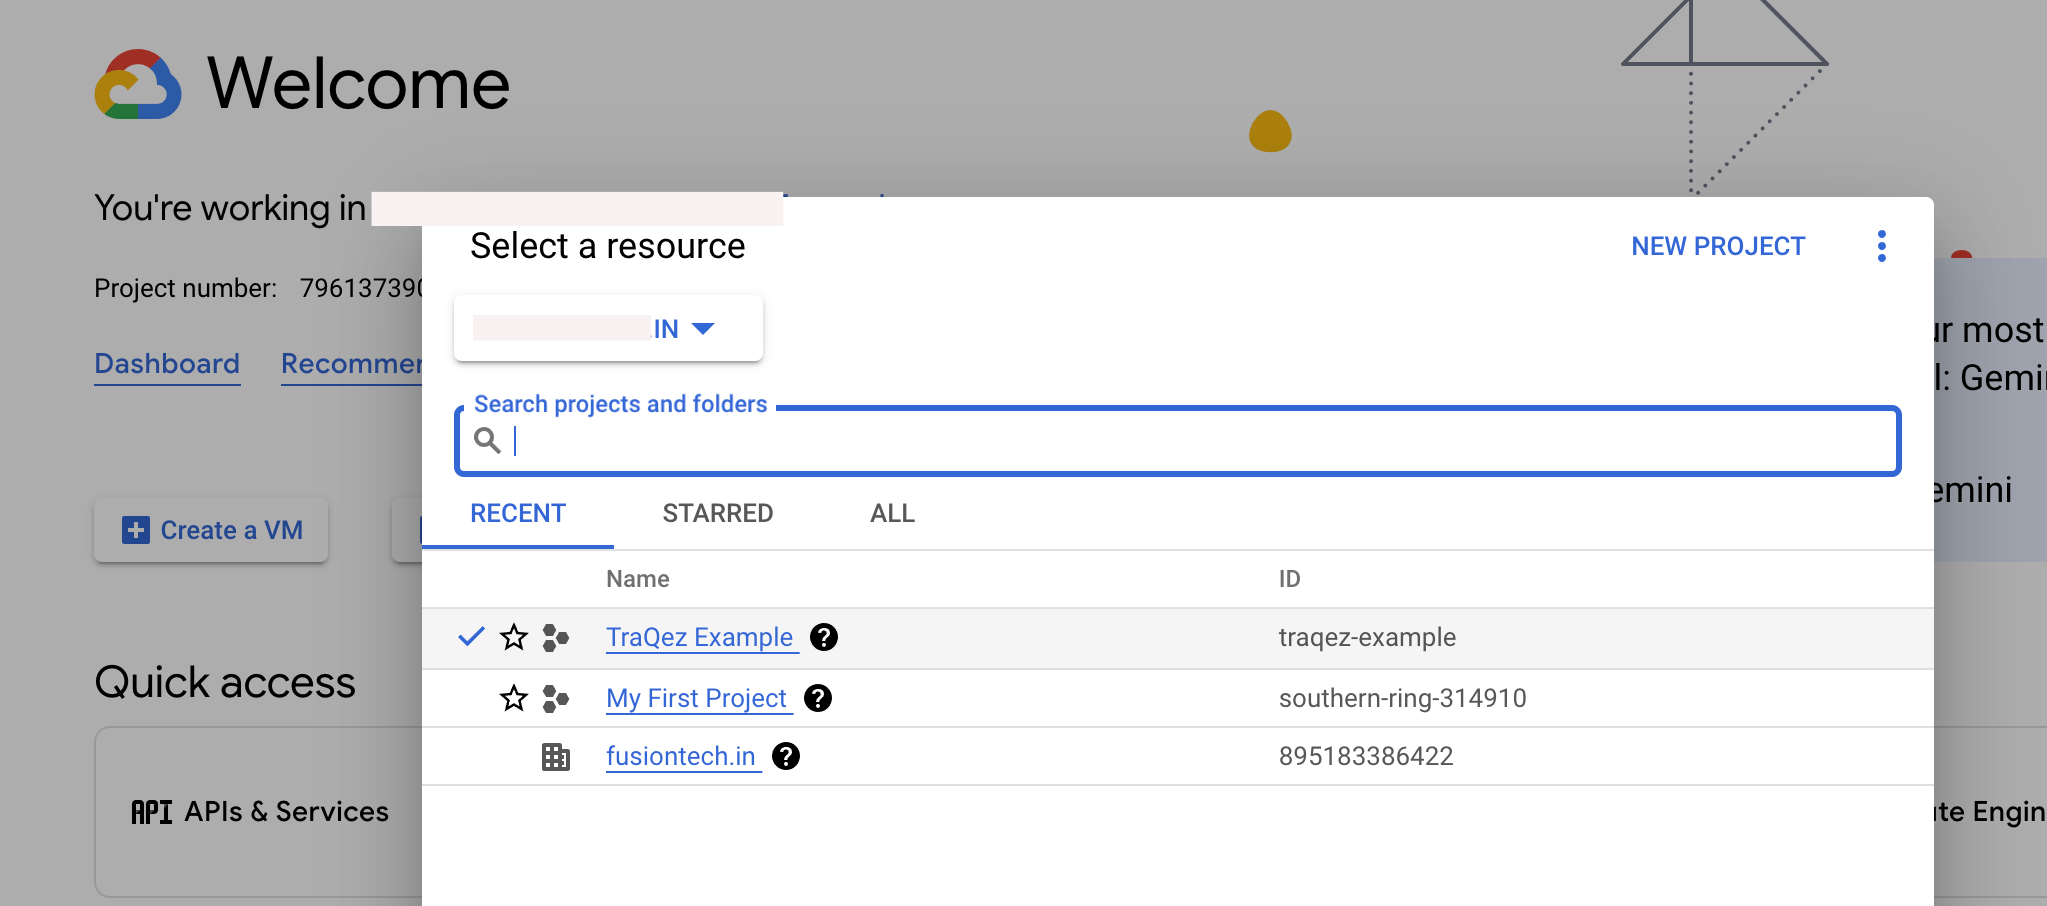
- Alternatively, you can also click on the project name located beside "Google Cloud" and to the left of the Search bar in the header.
To view a reference image of "project" within welcome page, click here to expand.

- Once the project is selected, navigate to
IAM & Adminby either clicking on it in the Quick Access section on the Welcome page or by searching forIAM & Admin. You will then be redirected toIAM & Admin Dashboard
To view a reference image of "Searching for IAM dashboard", click here to expand.

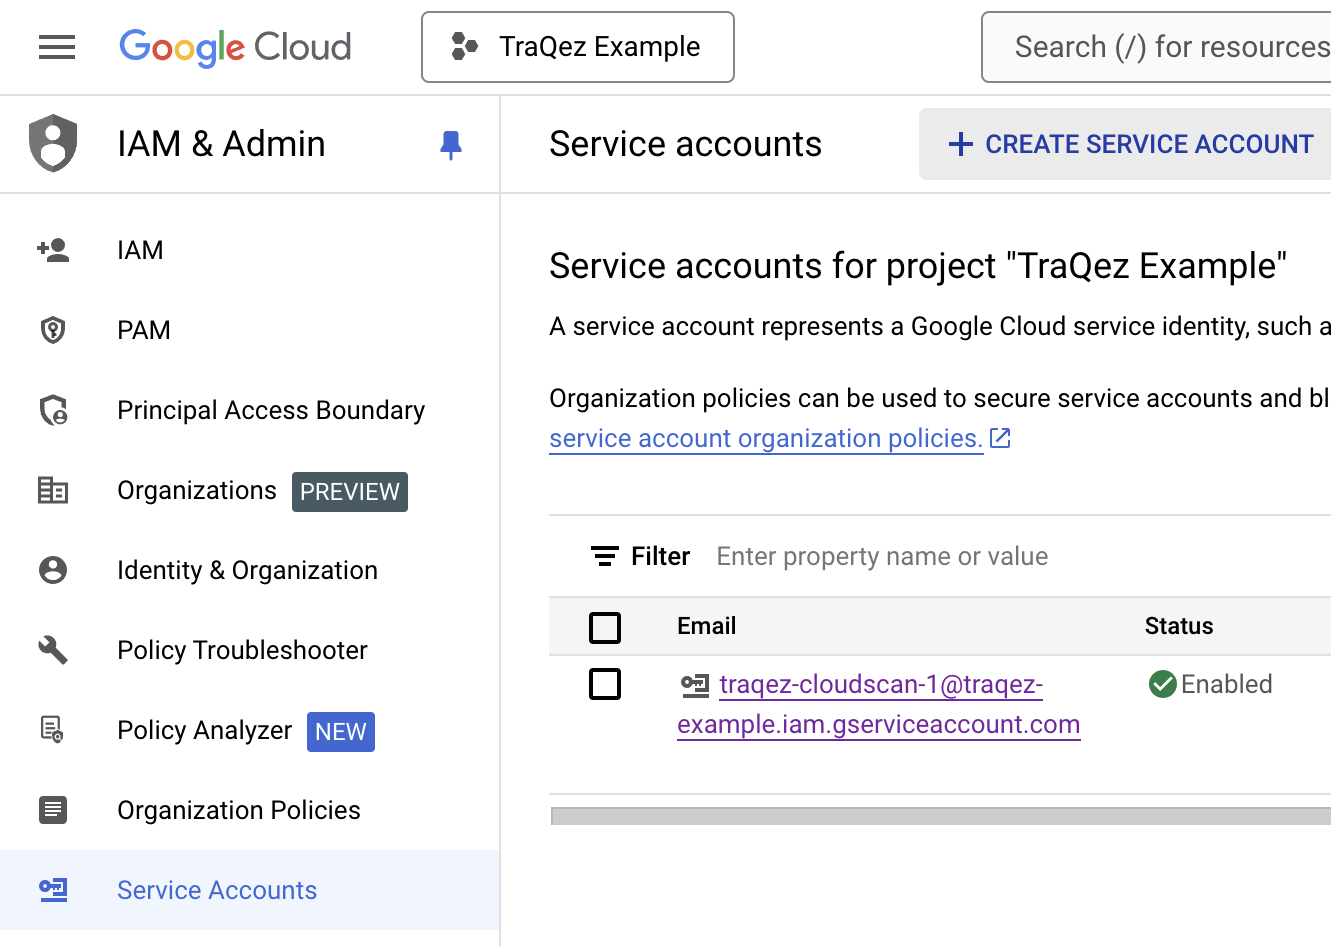
- In the left side Navigation bar, locate and click on
Service Accounts. - Click the
+ CREATE SERVICE ACCOUNTbutton located at the top middle of the page, below the search bar.
To view a reference image of locating "CREATE SERVICE ACCOUNT" button, click here to expand.
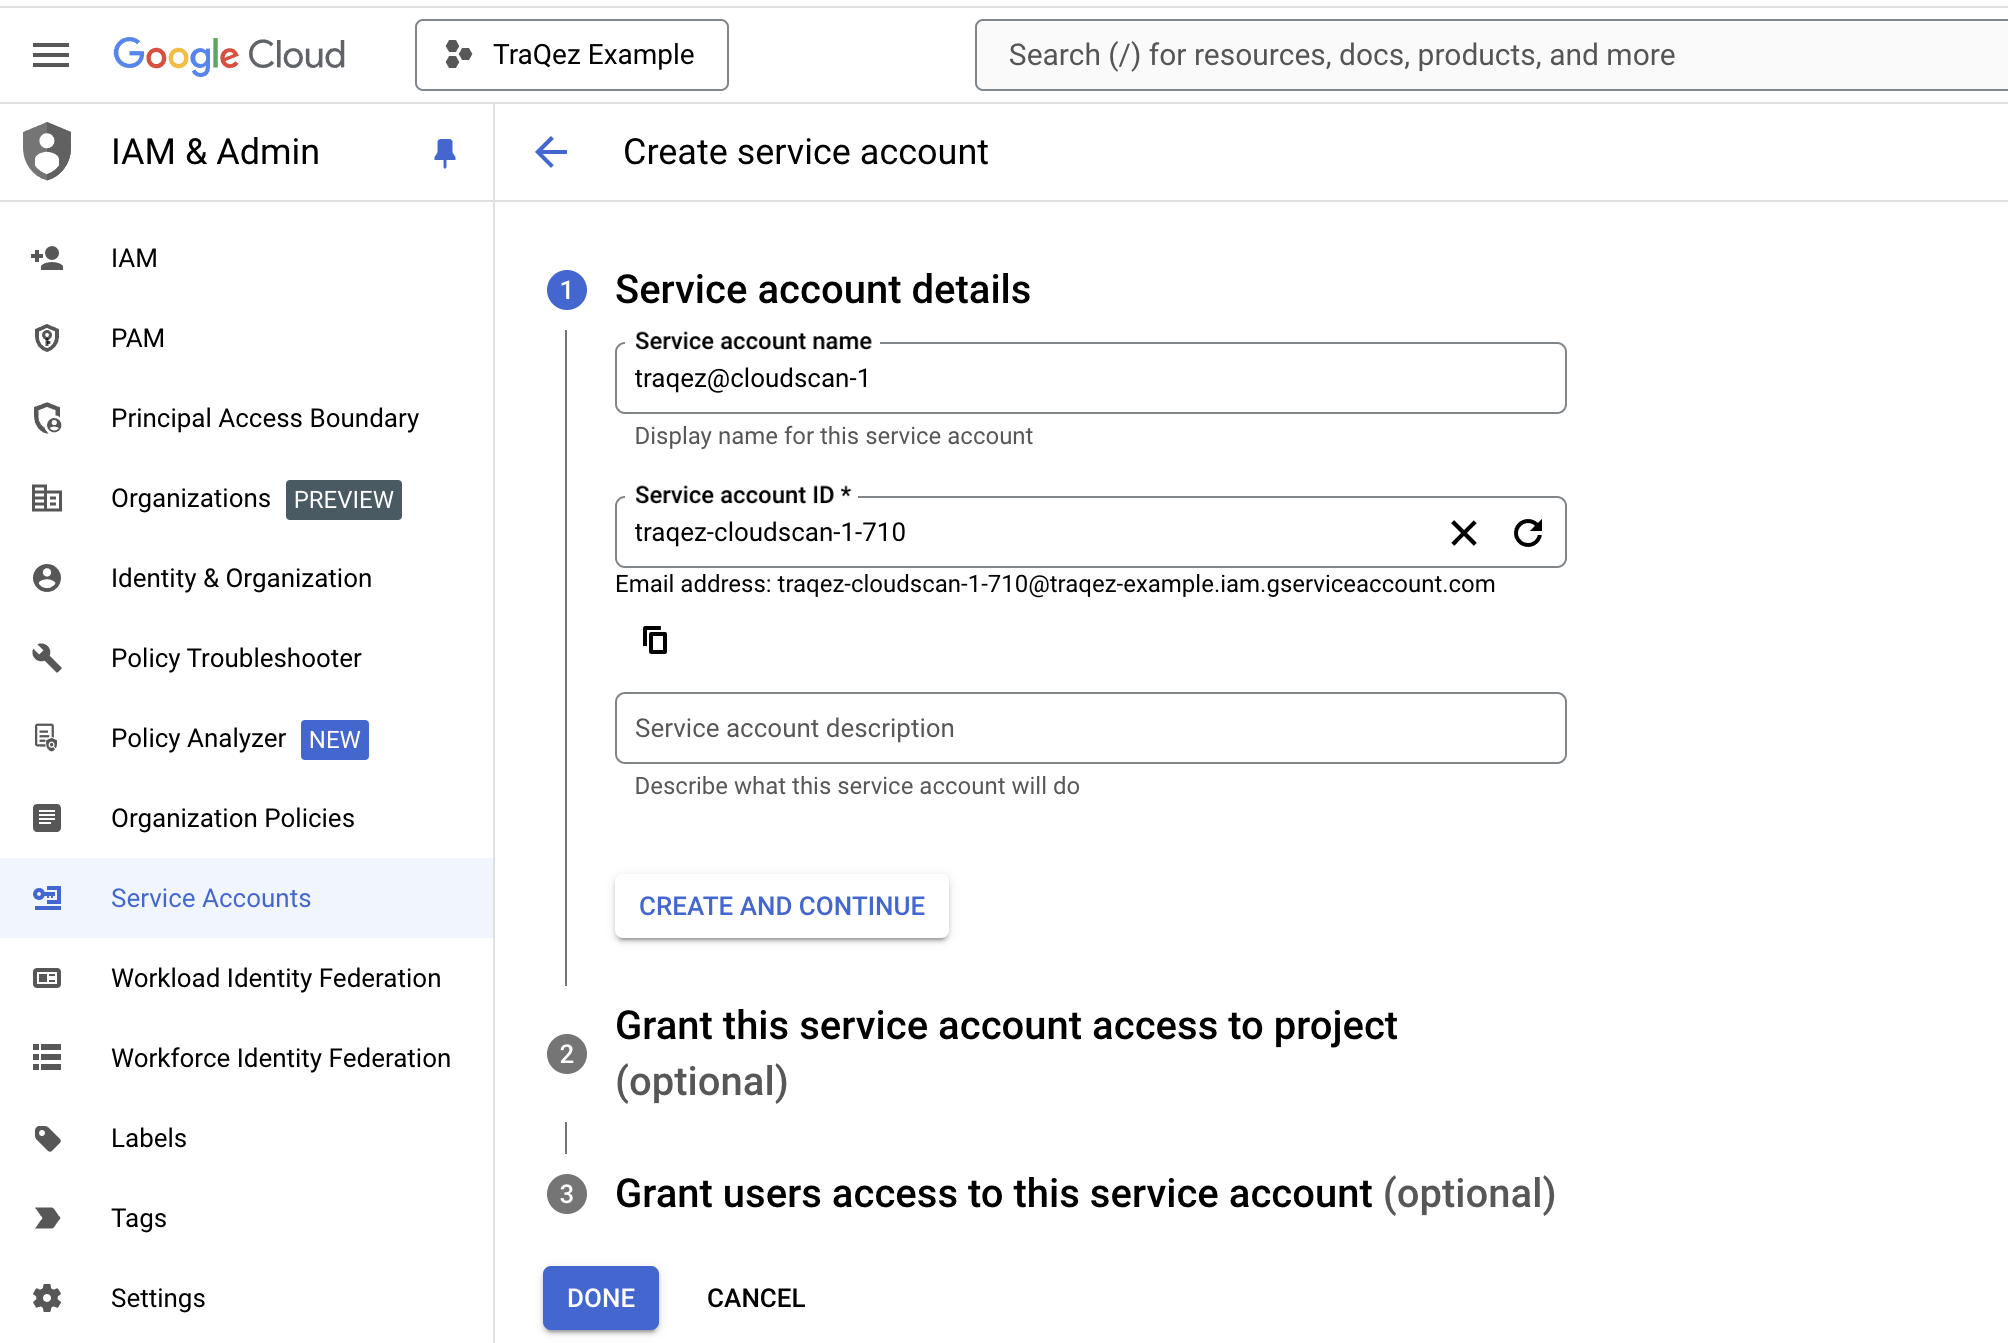
- Name the Service account as
traqez@cloudscan-1. The service account ID will auto-populate. Optionally add a description, then click "CREATE AND CONTINUE".
To view a reference image of service user: traqez@cloudscan-1, click here to expand.
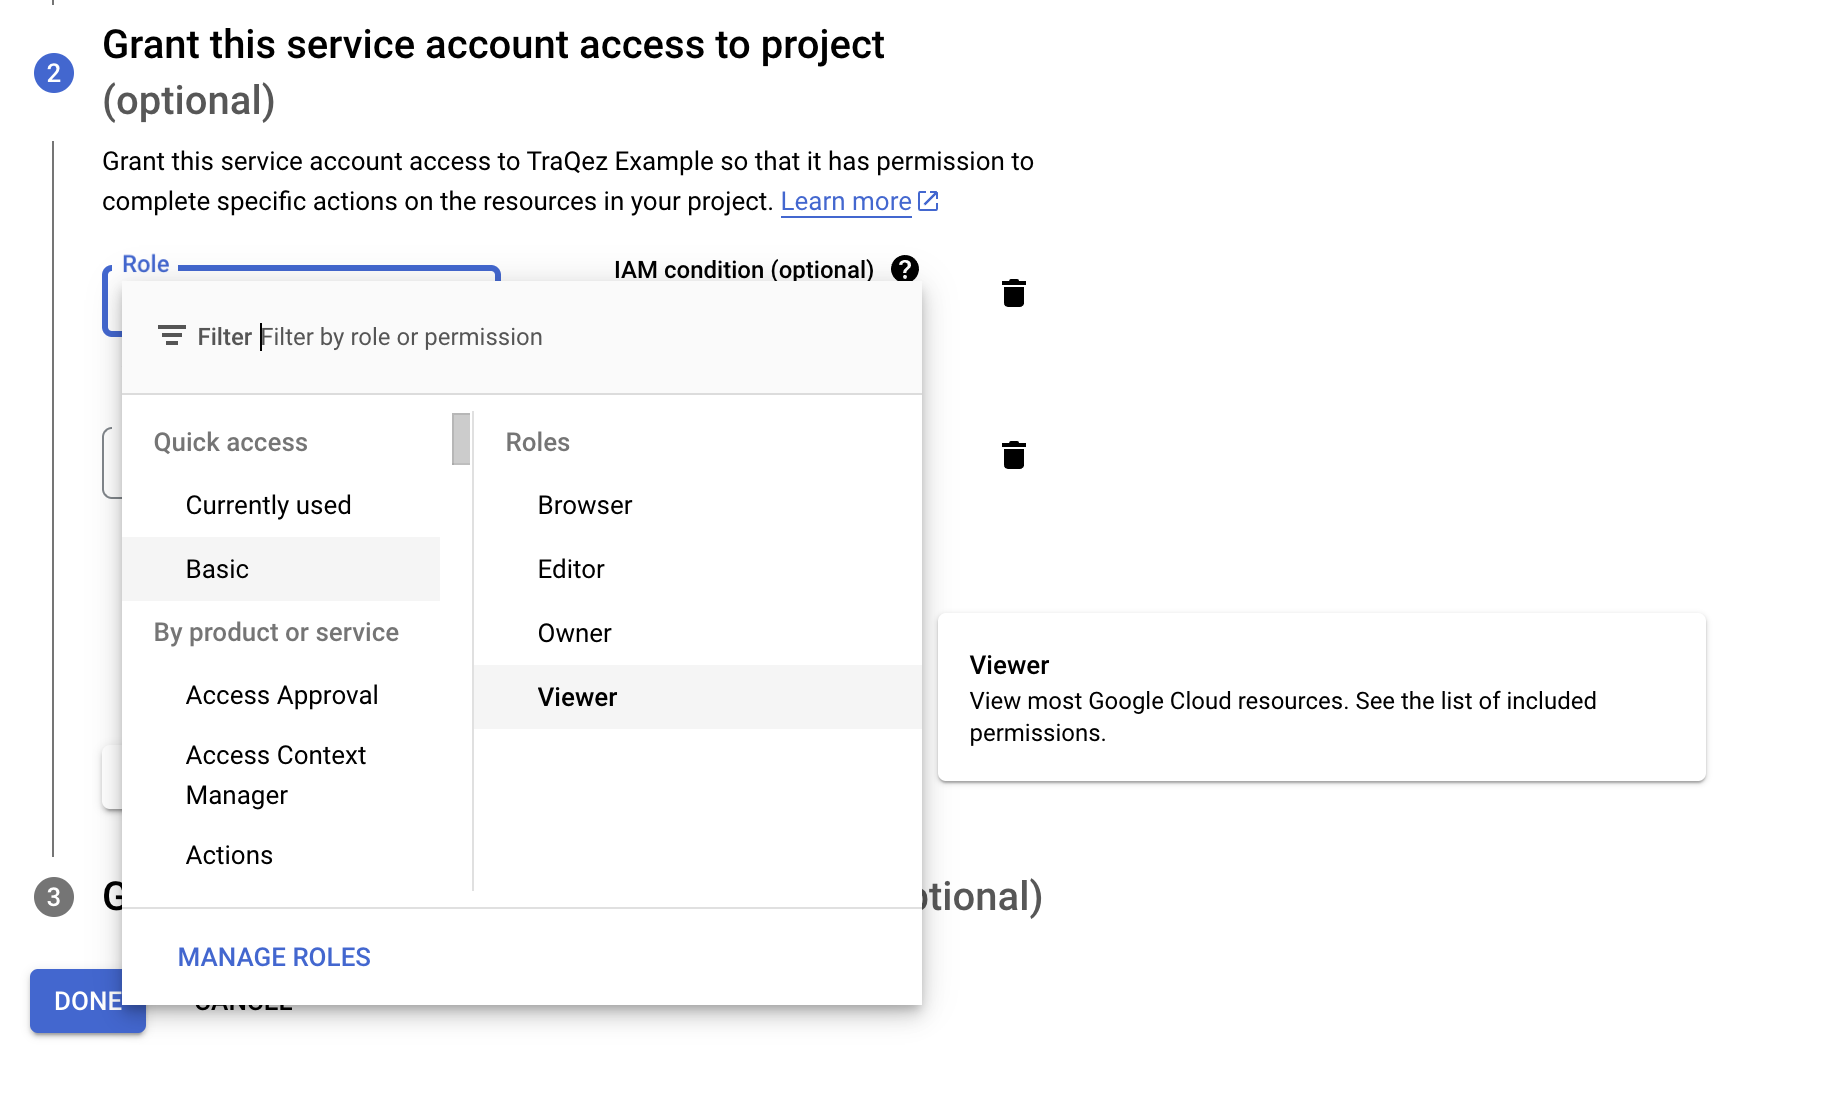
Grant this service account access to projectis required.- Click on the
Select a roledropdown, then navigate to theBasictab under Quick Access. From there, select theViewerrole, which allows viewing of most Google Cloud resources
To view a reference image of Viewer role, click here to expand.
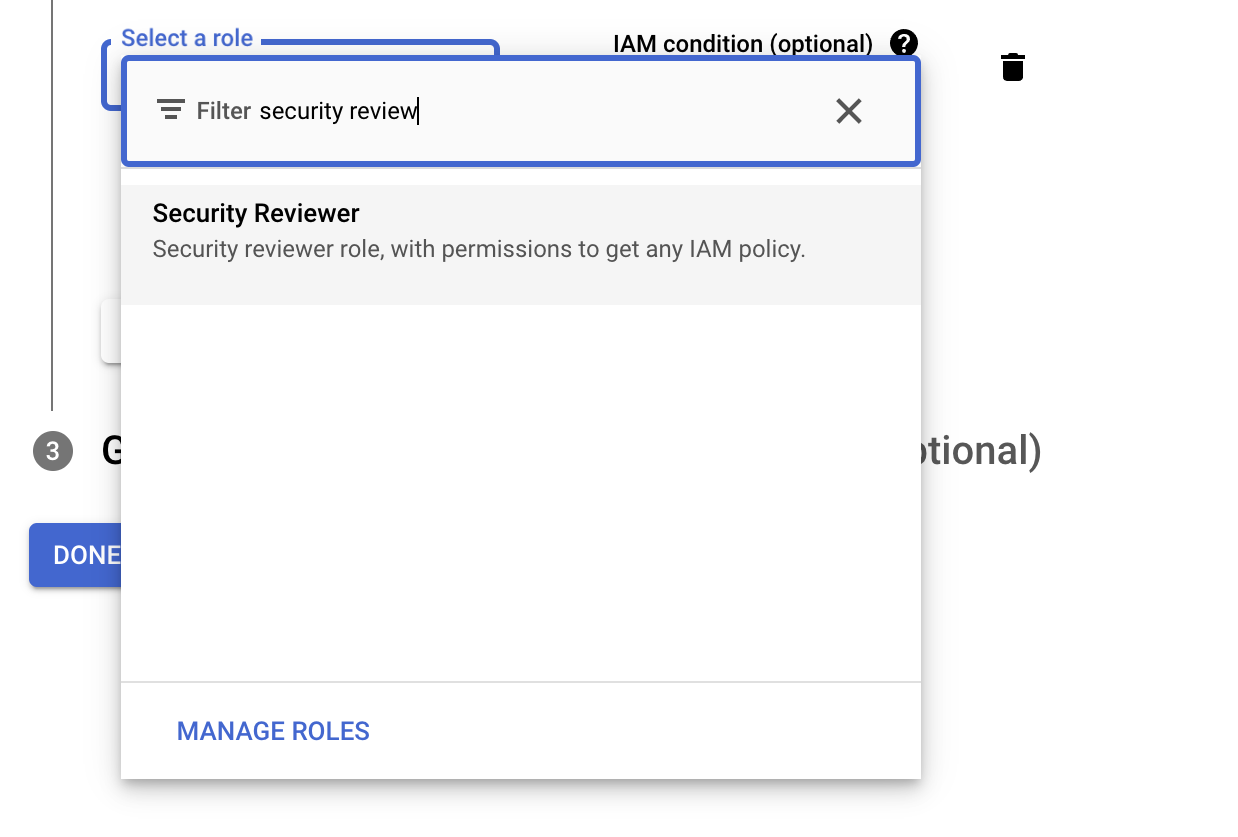
- Click
ADD ANOTHER ROLE, then click theSelect a roledropdown. Search for "Security Reviewer" and select theSecurity Reviewerrole from the menu, which grants permissions to get any IAM policy. Then, click "CONTINUE".
To view a reference image of security reviewer role, click here to expand.
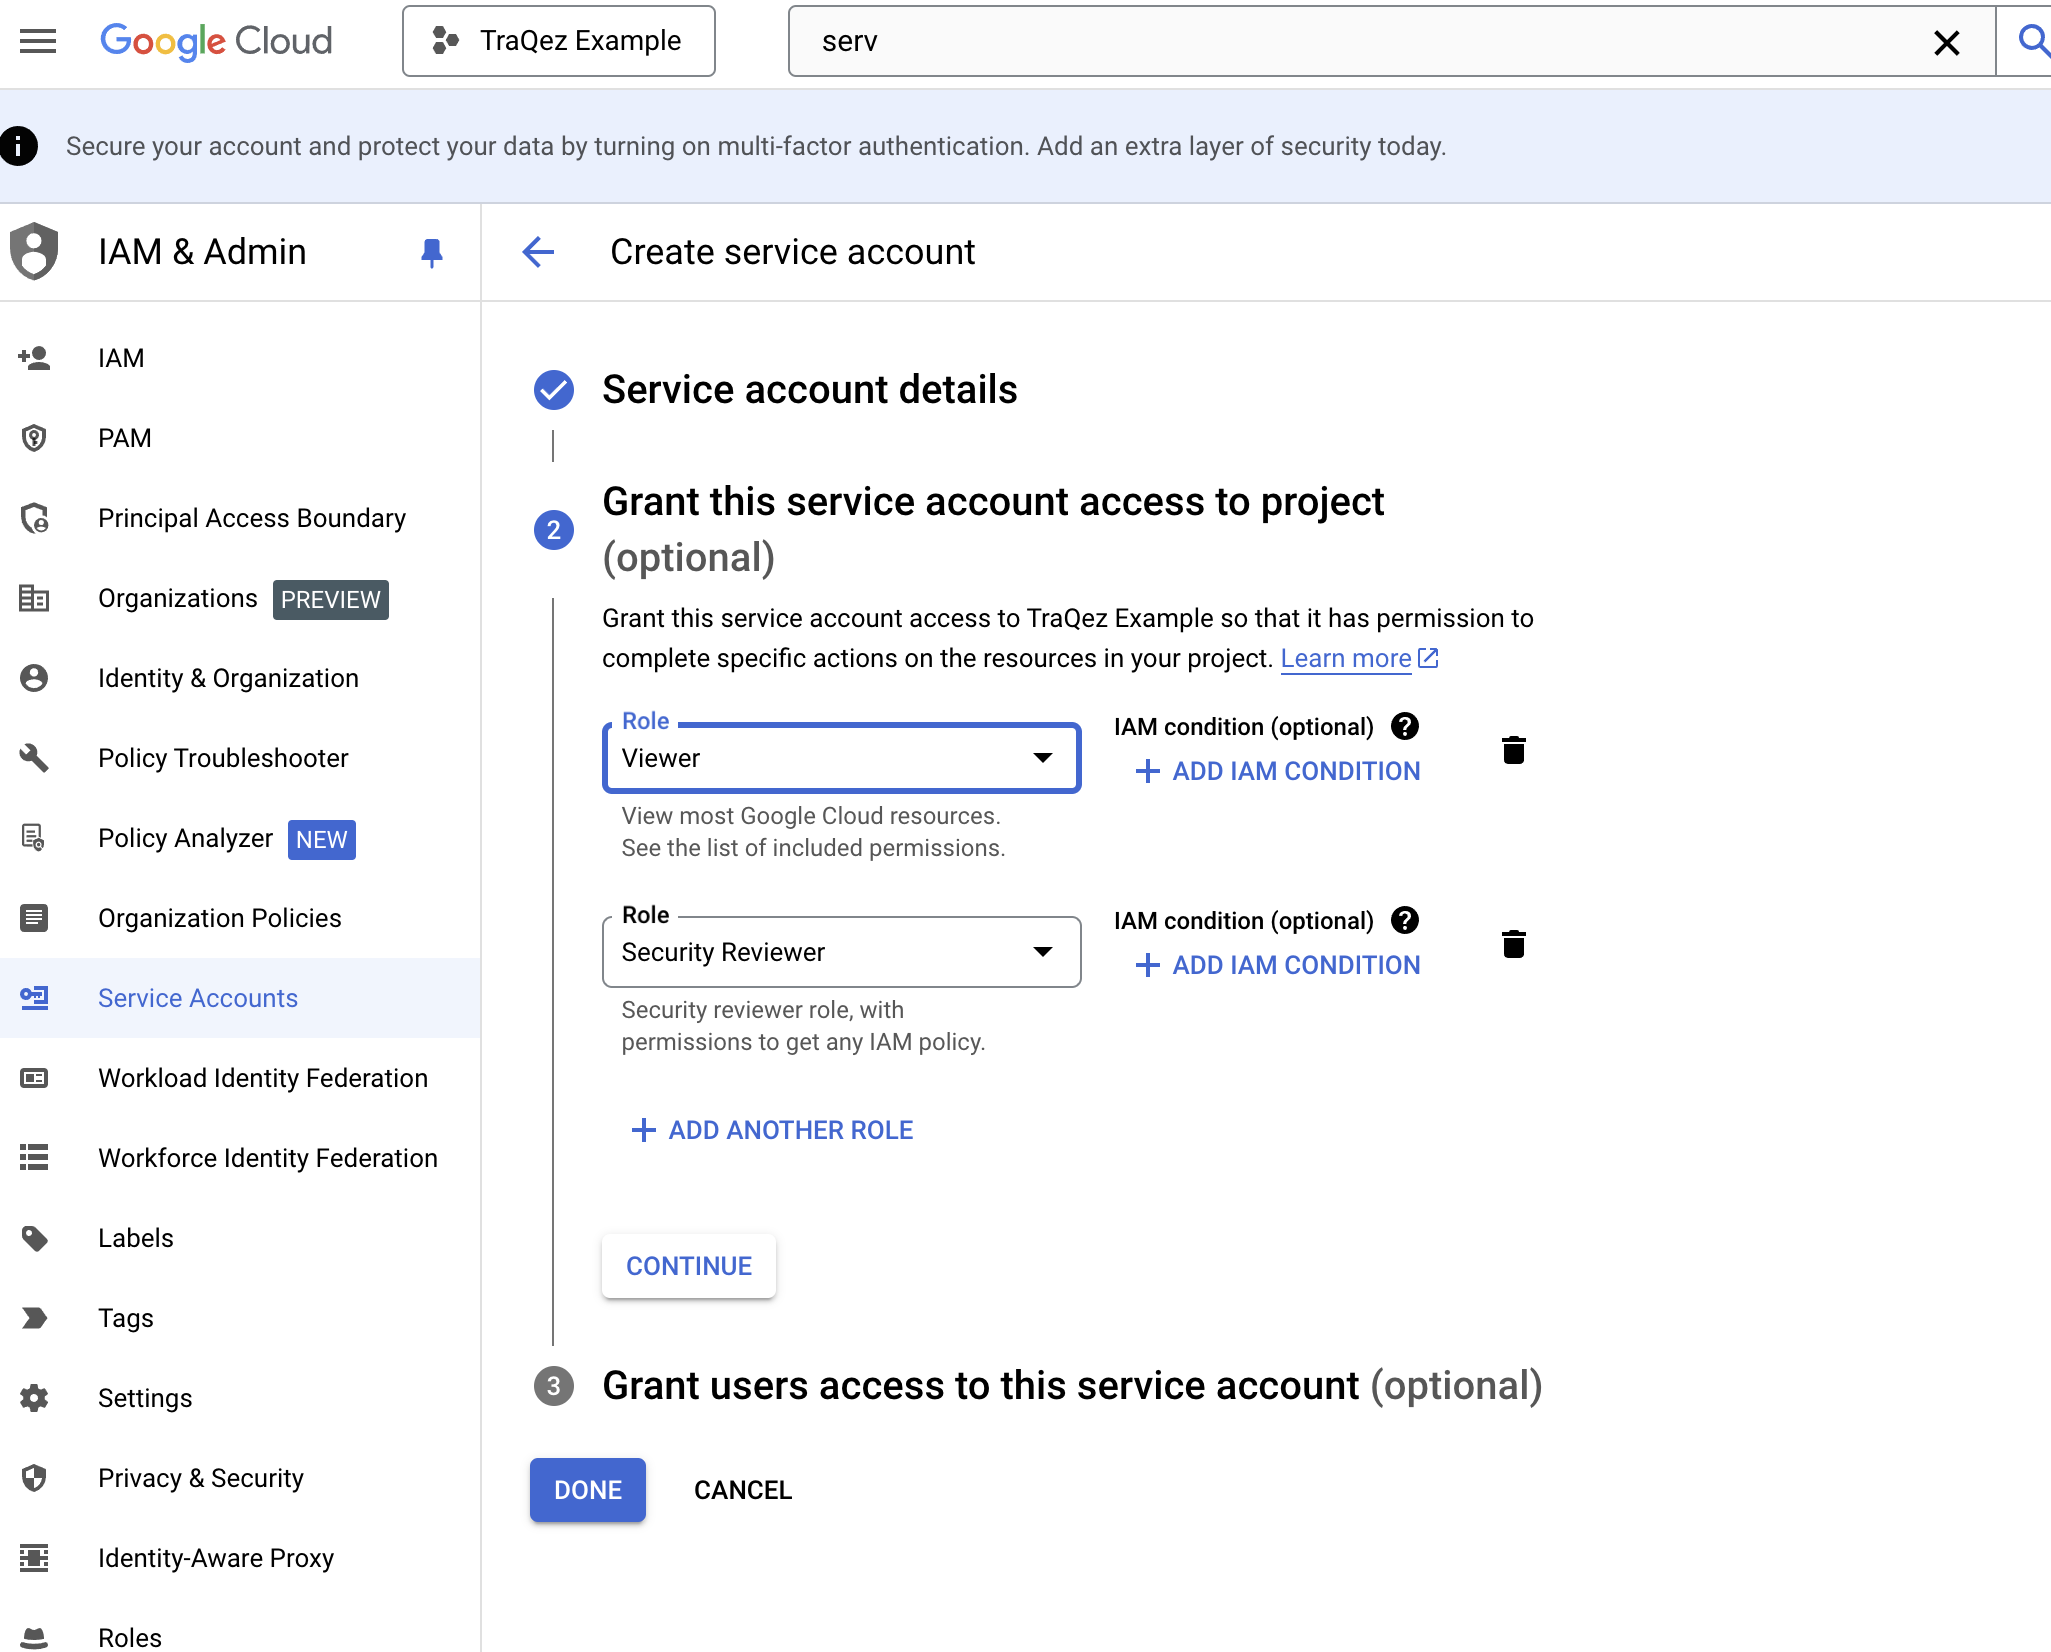
Grant users access to this service accountis optional and can be skipped.- Review the selected roles to ensure they are correct. The roles should be:
Viewer and Security Reviewer. If correct, then clickDone
To view a reference image of selected roles for the service account, click here to expand.
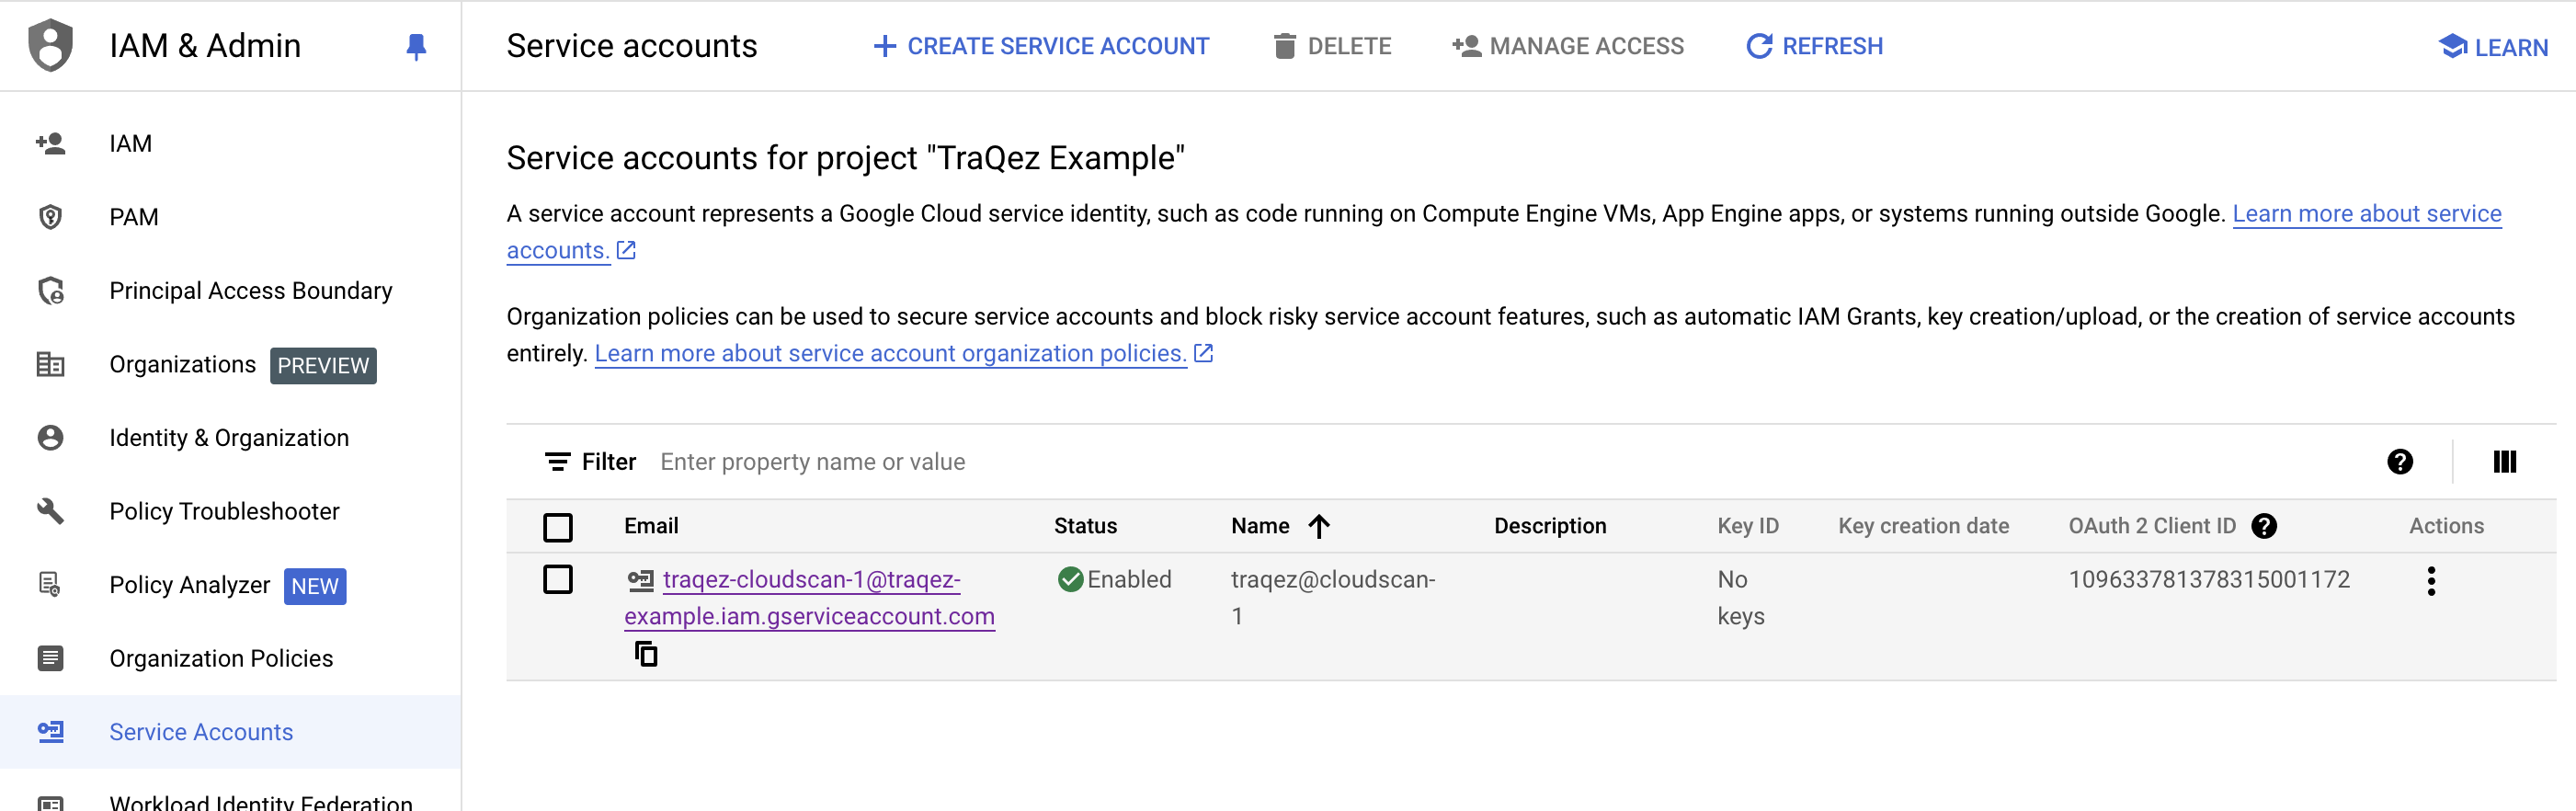
- In the service accounts list, search for the newly created service account by entering its name:
traqz@cloudscan-1. Selecttraqz@cloudscan-1account.
To view a reference image of created service account: traqez@cloudscan-1, click here to expand.
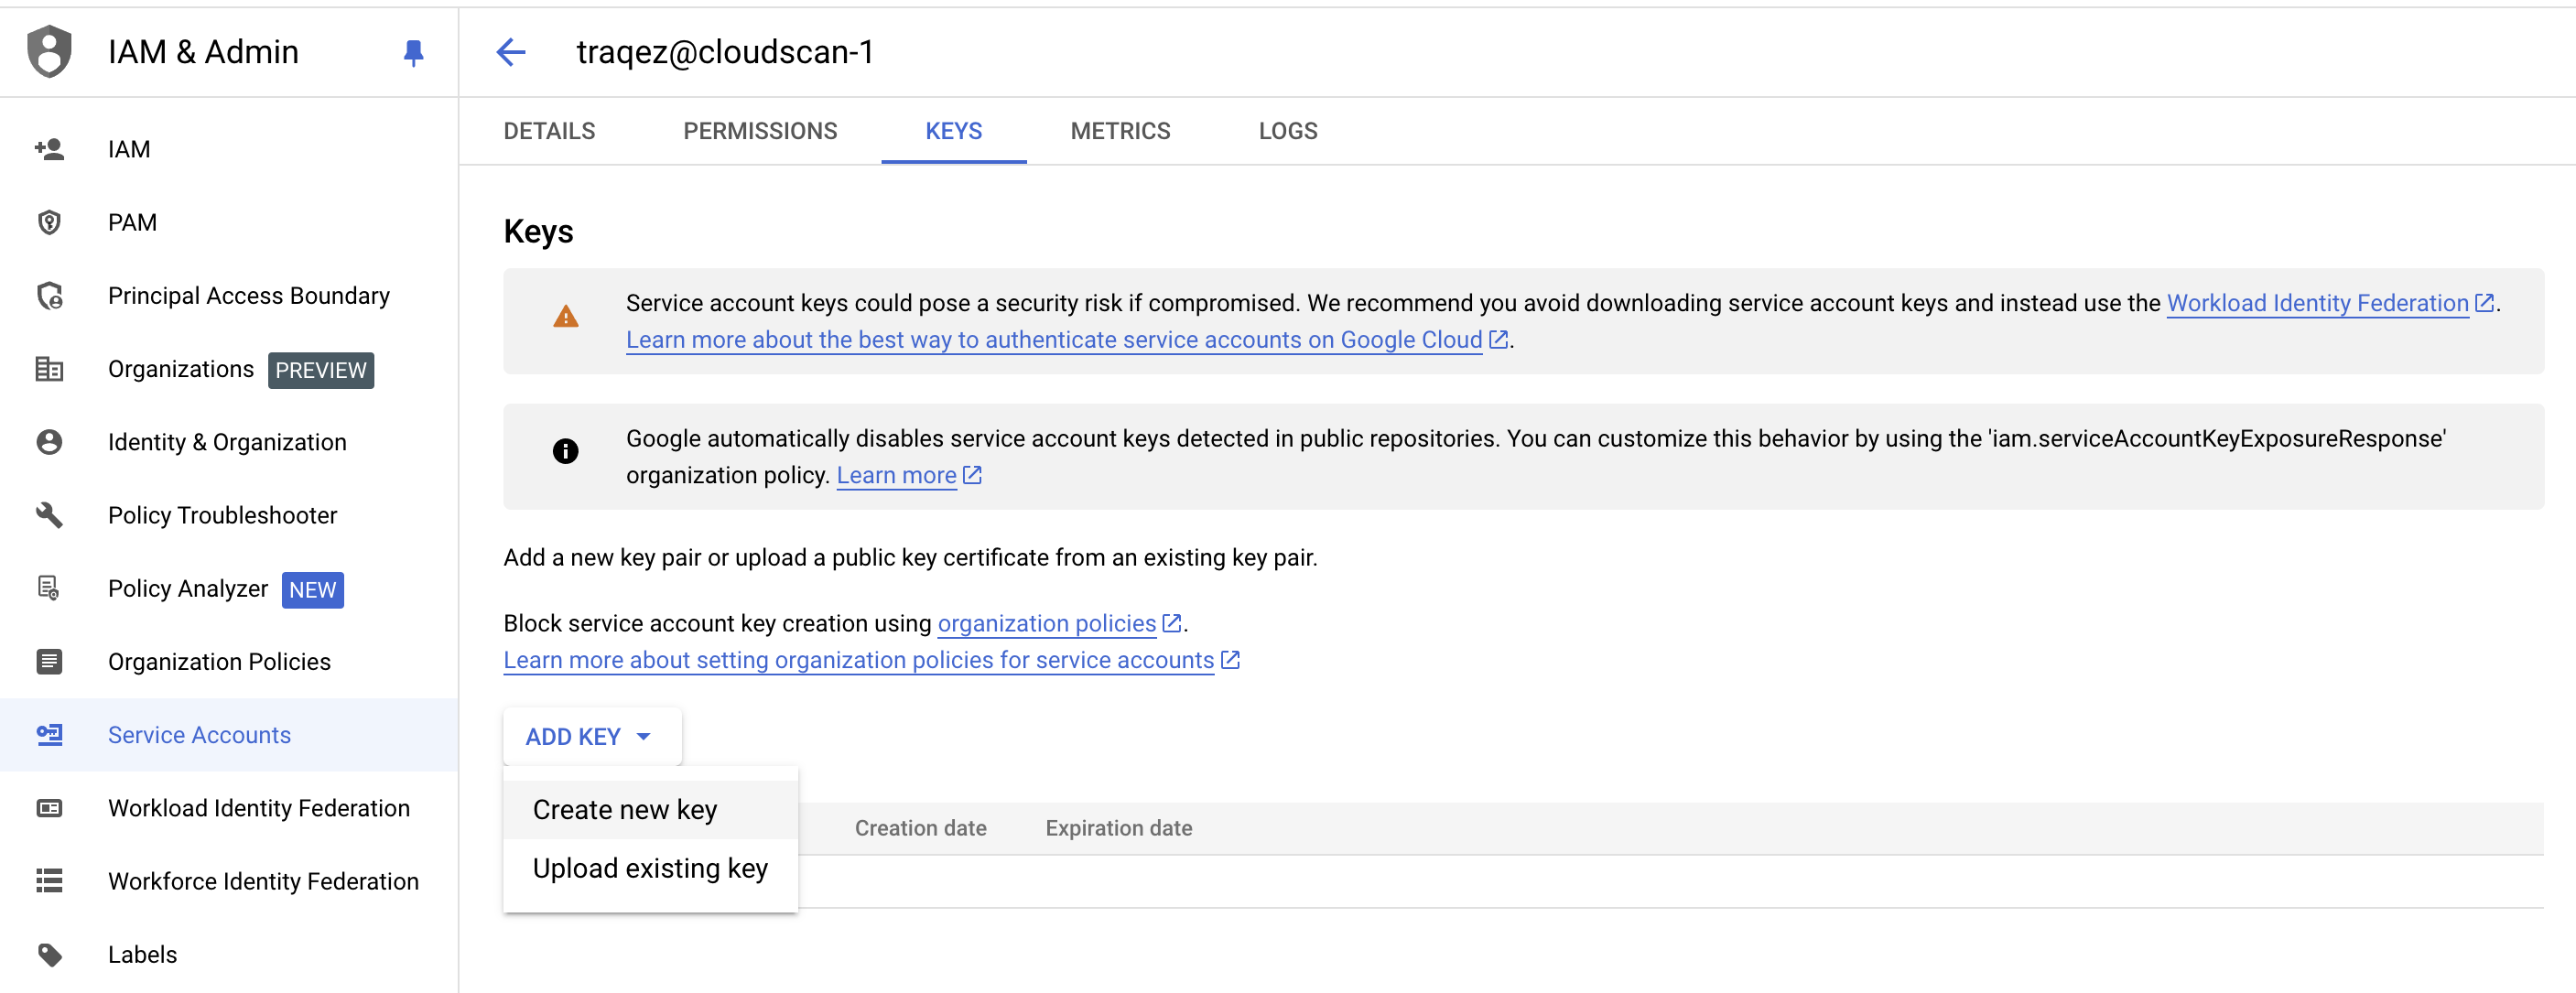
- Navigate to the
Keystab for the selected service account. LocateADD KEYand then selectCreate new key. In the popup, choose the key type asJSON. A JSON key file will be downloaded to your computer.
To view a reference image of creating a new key (credentials), click here to expand.
- The contents of the JSON credential file will be similar to:
{
  "type": "service_account",
  "project_id": "traqez-example",
  "private_key_id": "b8df5bbe7094d84b8b302fdf2b226ef421a263d3",
  "private_key": "-----BEGIN PRIVATE KEY-----\nMIIEvgIBADANBgkqhki........BS60jL\n-----END PRIVATE KEY-----\n",
  "client_email": "traqez-cloudscan-1@traqez-example.iam.gserviceaccount.com",
  "client_id": "109633781378315001172",
  "auth_uri": "https://accounts.google.com/o/oauth2/auth",
  "token_uri": "https://oauth2.googleapis.com/token",
  "auth_provider_x509_cert_url": "https://www.googleapis.com/oauth2/v1/certs",
  "client_x509_cert_url": "https://www.googleapis.com/robot/v1/metadata/x509/traqez-cloudscan-1%40traqez-example.iam.gserviceaccount.com",
  "universe_domain": "googleapis.com"
}
- Open the downloaded JSON credential file, copy the entire JSON data, and then paste it into the
Credentialstextbox in the Connectors dashboard within Cloud Security (CSPM).
Enabling the API & Services
Important note: To use the TraQez Security Scanner, you must enable the required APIs within the Google Cloud Platform. This is necessary for the scanner to send API requests and retrieve project data.
- The following APIs must be enabled in the Google Cloud Platform for the TraQez Security Scanner to function properly:
- API Keys API (apikeys.googleapis.com)
- Artifact Registry API (artifactregistry.googleapis.com)
- BigQuery Data Policy API (bigquery.googleapis.com)
- Cloud SQL Admin API (sqladmin.googleapis.com)
- Cloud Storage API (storage.googleapis.com)
- Compute Engine API (compute.googleapis.com)
- Dataproc Resource Manager API (dataproc.googleapis.com)
- Cloud DNS API (dns.googleapis.com)
- Container Registry API (containerregistry.googleapis.com)
- Container API (container.googleapis.com) - specifically the Container Security API
- Identity and Access Management (IAM) API (iam.googleapis.com)
- Cloud Key Management Service (KMS) API (cloudkms.googleapis.com)
- Cloud Logging API (logging.googleapis.com)
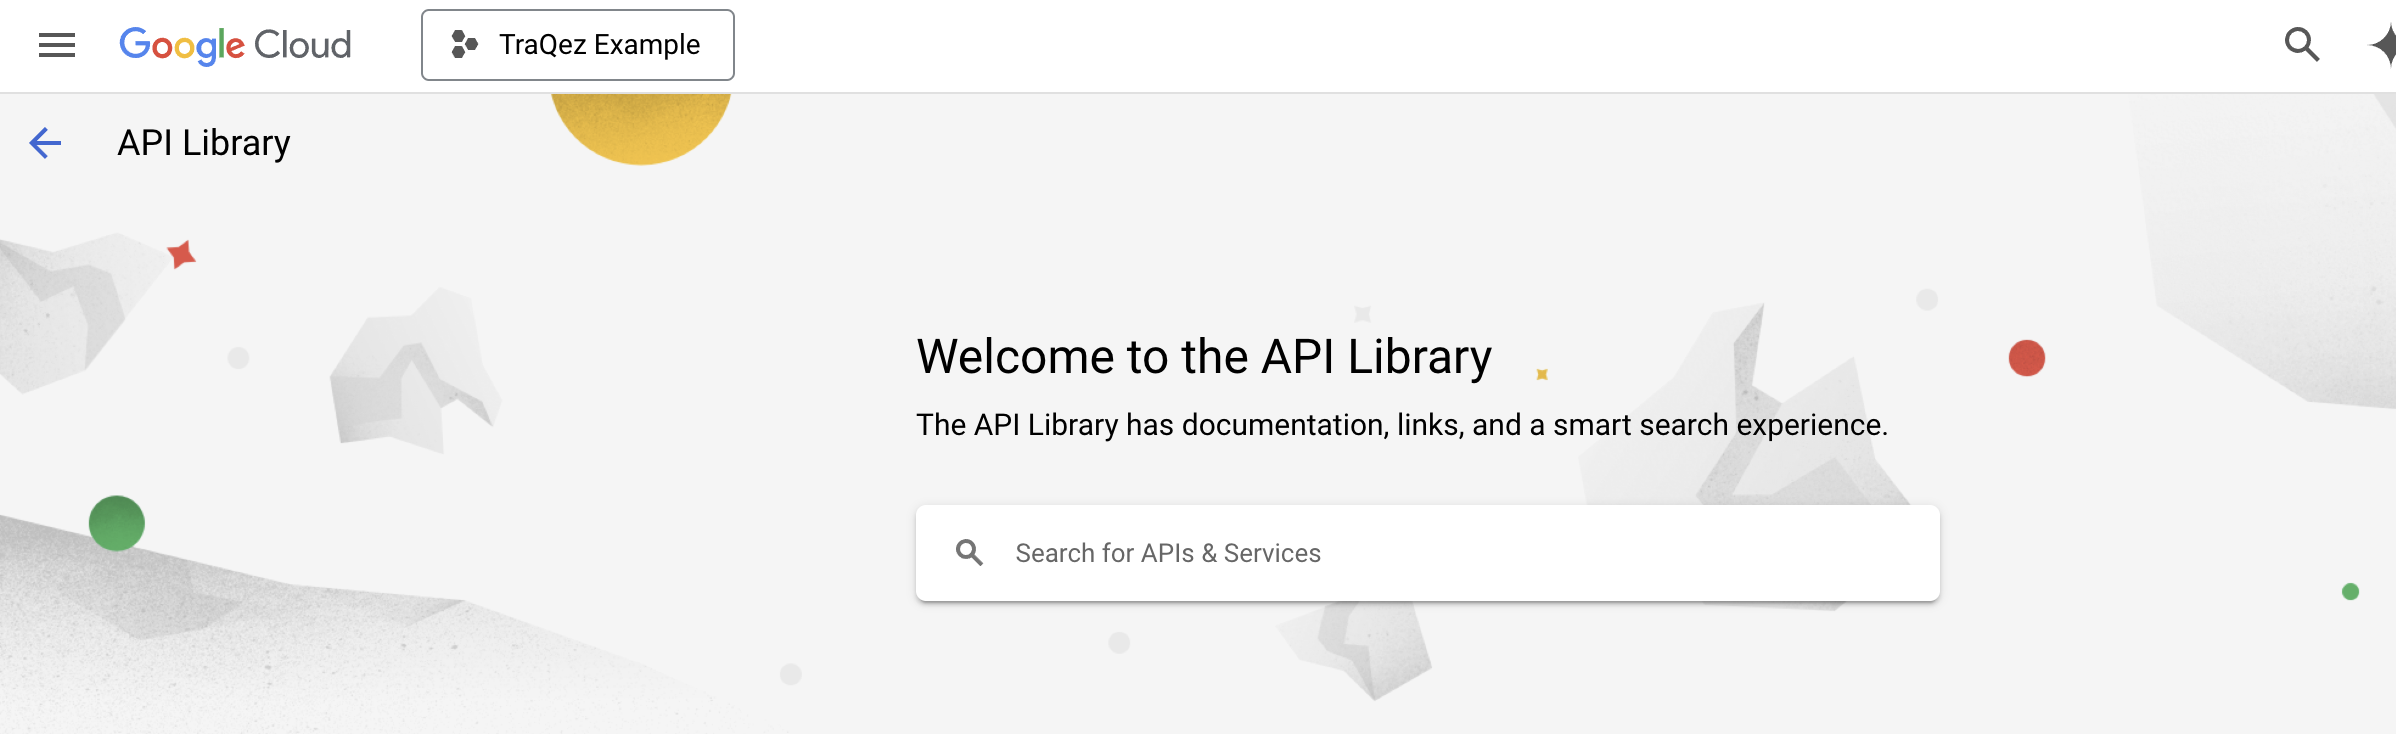
- In the Google Cloud Console, type "API & Services" in the search bar. From the search results, select
API & Services(also known as API Library) to access the page where you can enable and manage APIs.
To view a reference image of API & Services search, click here to expand.

To view a reference image of "ENABLE APIS AND SERVICES" button, click here to expand.

- To enable the necessary APIs, follow these steps within the
API & Servicesdashboard, repeating the process for each of the 13 required API services:- Click the "+ ENABLE APIS AND SERVICES" button, located directly below the search bar. This will open a new page titled
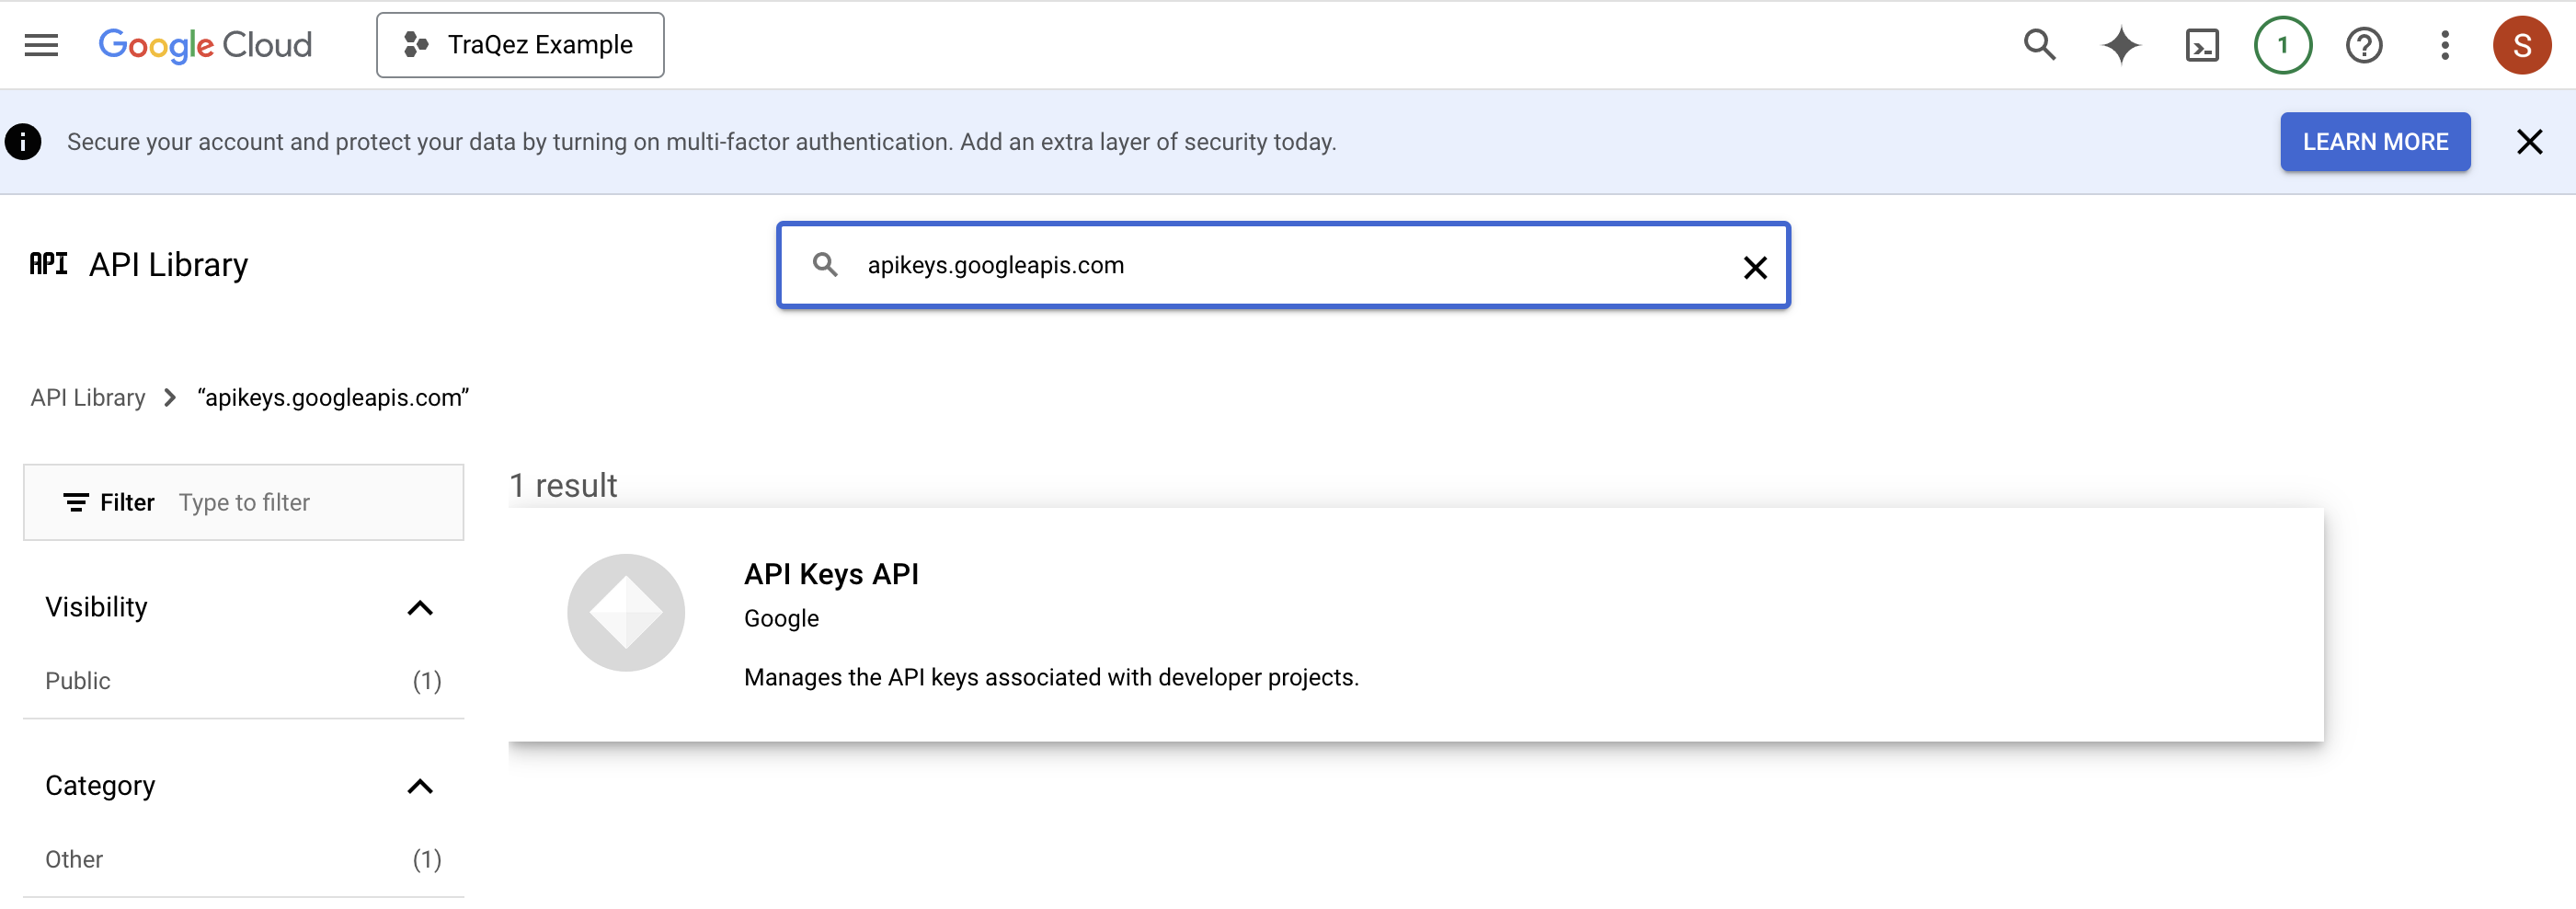
Welcome to the API Library. On this page, you'll find a search box where you can enter the name of the API you want to enable. - Using the API service
apikeys.googleapis.comas an example, paste the API service name:apikeys.googleapis.comorAPI Keys APIin the search box and press the Enter key to search for the API. - After searching, you'll typically get one result; click on that result, which in this example would be
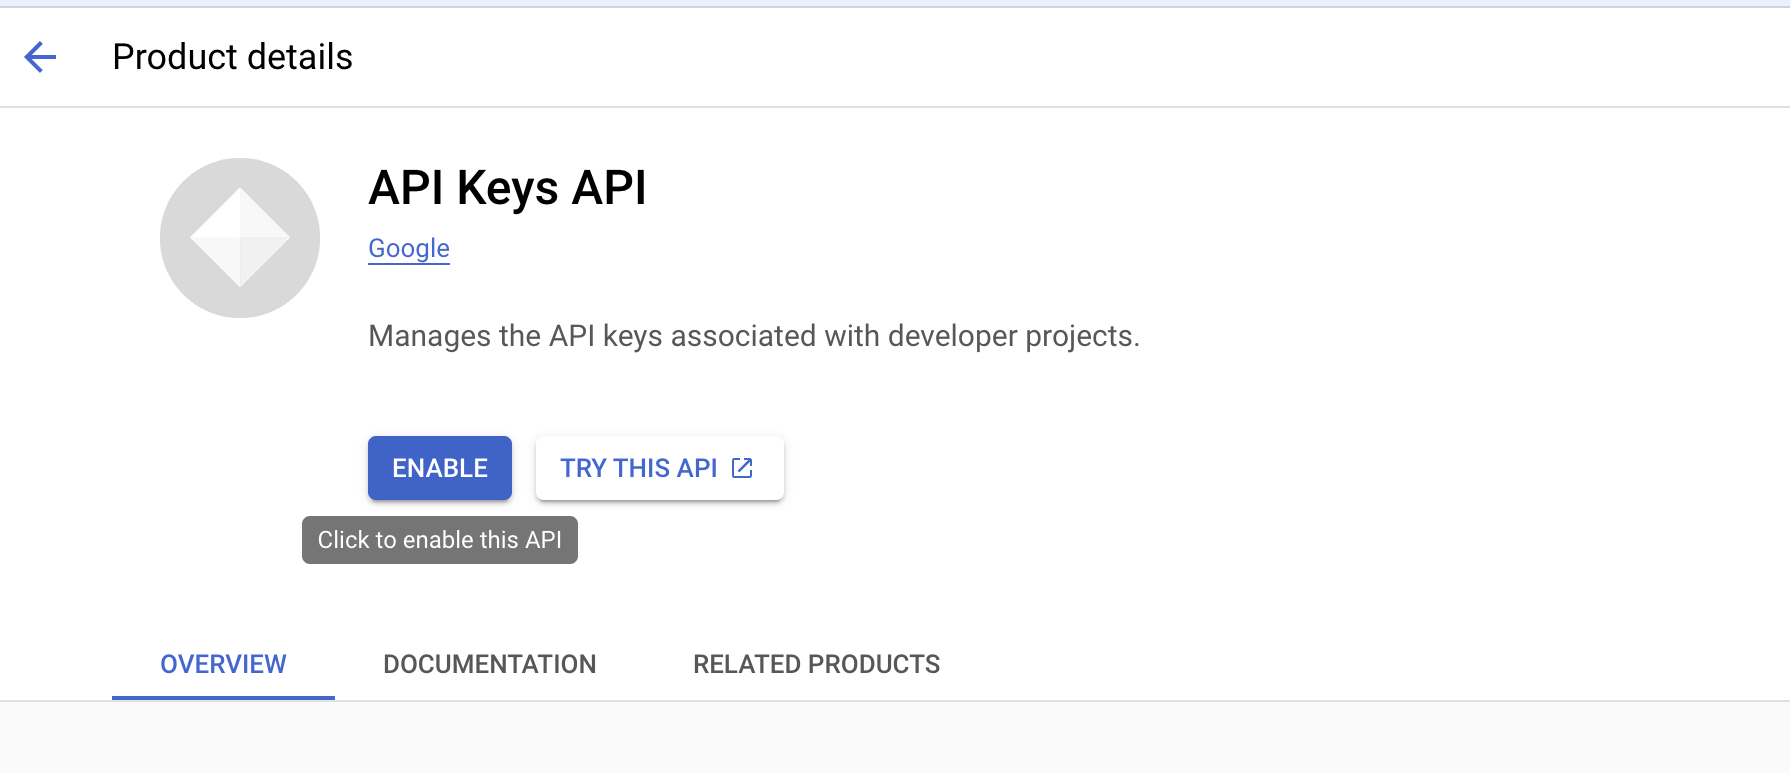
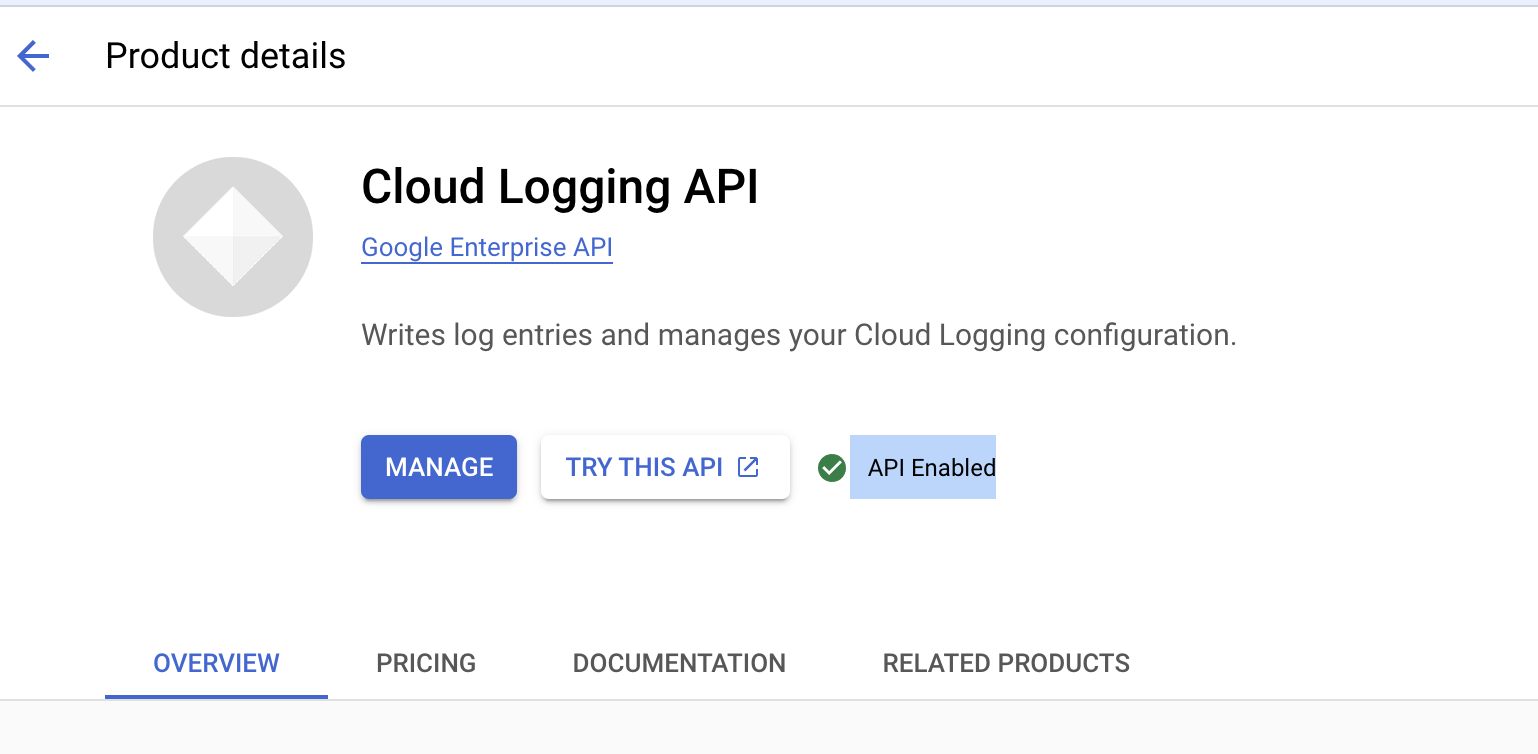
API Keys API. - After selecting the search result, you'll be taken to a new webpage, where you'll find an
ENABLEbutton if the API hasn't been enabled yet. - If the API is already enabled, you'll see the text "API enabled" displayed, and instead of the
ENABLEbutton, you'll see aMANAGEbutton.
- Click the "+ ENABLE APIS AND SERVICES" button, located directly below the search bar. This will open a new page titled
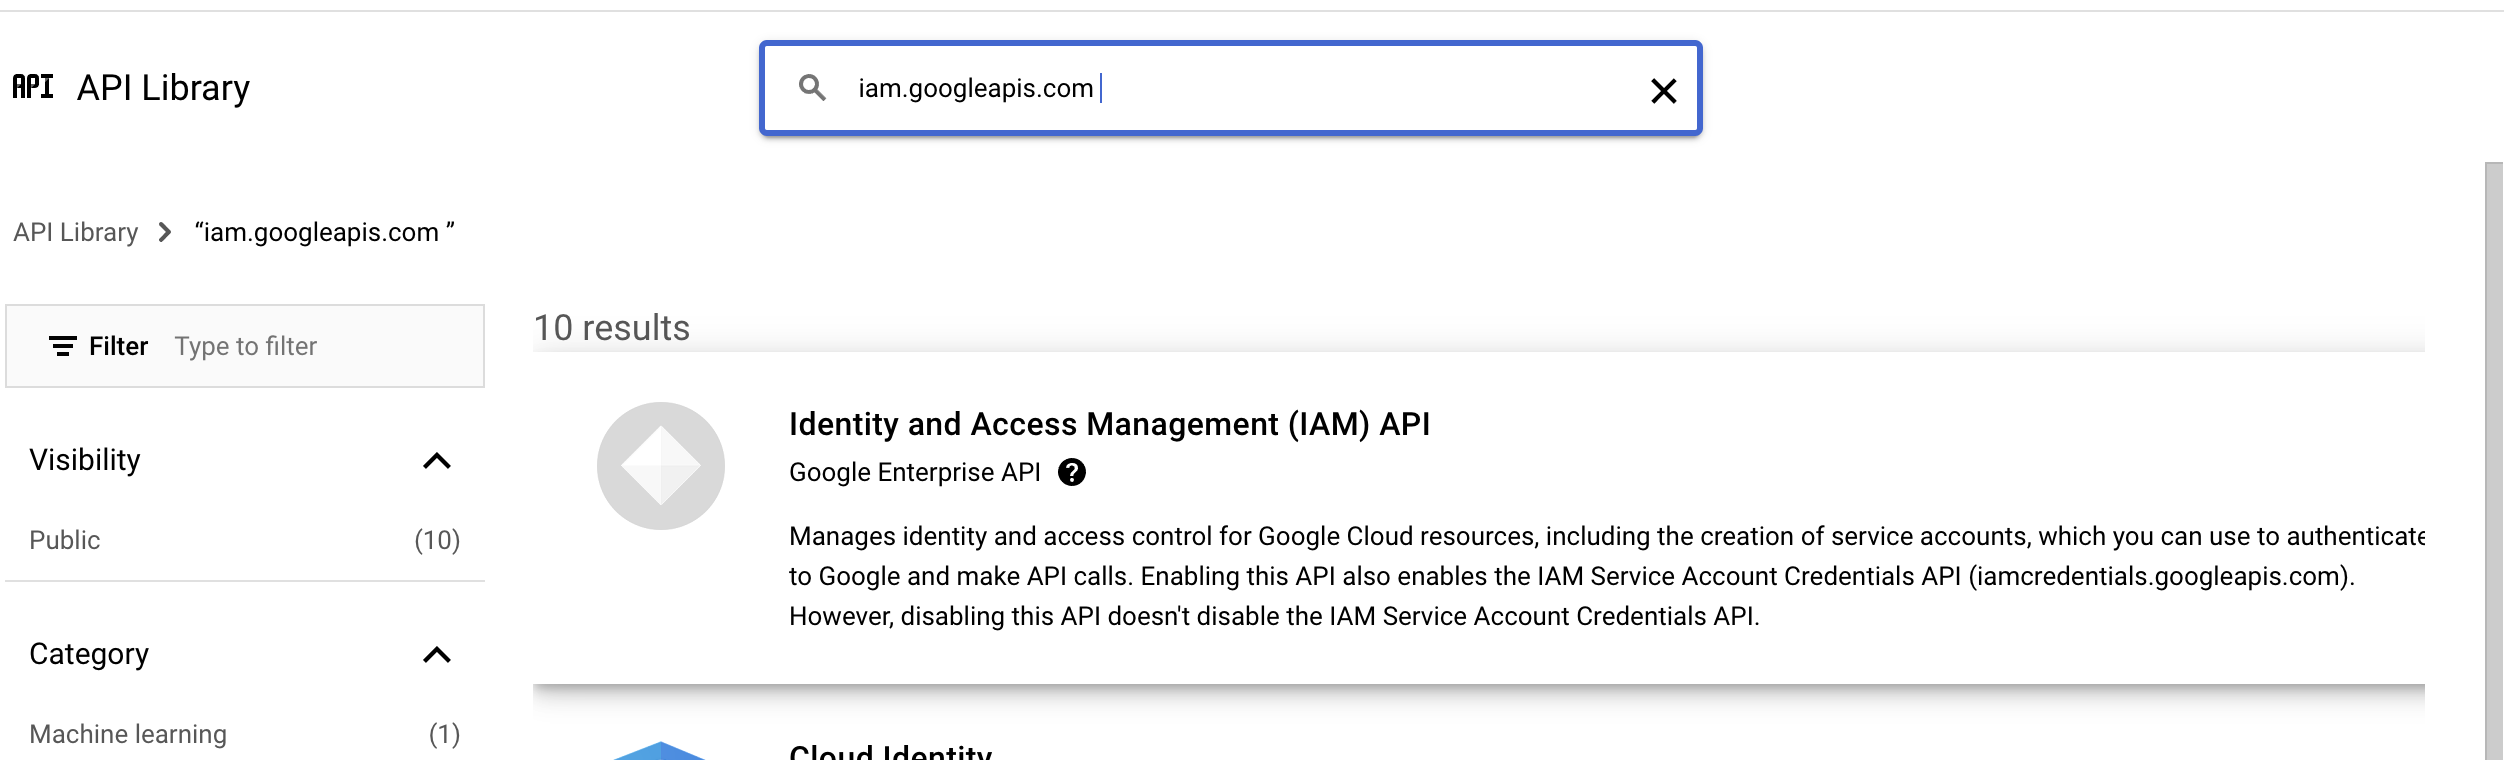
- Repeat the steps for each service. If searching for a specific API service name (e.g.,
iam.googleapis.com) yields multiple results, refine your search by using the full API name (e.g.,Identity and Access Management (IAM) API).
NOTE: Certain API services, such as logging.googleapis.com, are enabled by default, so you won't need to manually enable them.
NOTE: Certain API services, such as artifactregistry.googleapis.com, require billing to be enabled before they can be used, as indicated by the "billing-required" label.
To view a reference images of "Steps for enabling API Service", click here to expand.
Upon clicking the "ENABLE APIS AND SERVICES" button, you will be directed to the "Welcome to the API Library" page.
Enter the API name (e.g. apikeys.googleapis.com)
Click on the relevant search result, then click the "ENABLE" button to activate the API service
If you get multiple search results, refine your search by using the full API name, such as "Identity and Access Management (IAM) API" instead of just "iam.googleapis.com".
Some of the API's might be enabled as default (eg: logging.googleapis.com)
Creating new Connector
Fill in the remaining connector details along with pasting the credentials json data downloaded from Google cloud console.
- Select the cloud Provider:
GCPfrom the dropdown. - Enter the desired
Connector Name,DescriptionandTags. - Scan Settings: Configure the frequency of your scans and email report settings in this section. You can modify these settings at any time, even after the scan has been created.
- Configure periodic cloud security scanning by selecting the
Perform periodic scanning for new Connectoroption:- Daily: Scan assets daily at a specified time.
- Weekly: Scan assets weekly on a chosen day (e.g., Friday, Saturday) at a specified time.
- Bi-Weekly: Scan assets every other week on a chosen day at a specified time.
- Monthly: Scan assets monthly on a chosen day within the first week of the month at a specified time.
- Schedule a one-time scan for a future date and time by selecting the
Schedule Scan at given time and run only once.option. The scan will execute at the specified time based on your configured user timezone.
Note: When enabling periodic/continuous scanning, the configured scan time will be executed in UTC Timezone. For example, if you schedule a scan for 4:00 am, it will run at 4:00 am UTC, not 4:00 in your local timezone.
- Scan Options: Customize the behavior of the vulnerability scanner and refine your results using the following options:
- Save all scan artifacts for later reference. Select this option to store all scan-related data, including logs and evidence, for future reference. This will retain raw data generated during the scan.
- Save vulnerabilities with information/log level. Log information level messages from the vulnerability scanner which includes enumeration information, service information etc. Also useful for asset discovery and mapping.
- Scan for all supported services across your cloud environment. Enable this checkbox to scan all supported services within Google Cloud (around 12 services are supported.) or customise what services need to be scanned by selecting the dropdown
Select custom services for cloud environment.
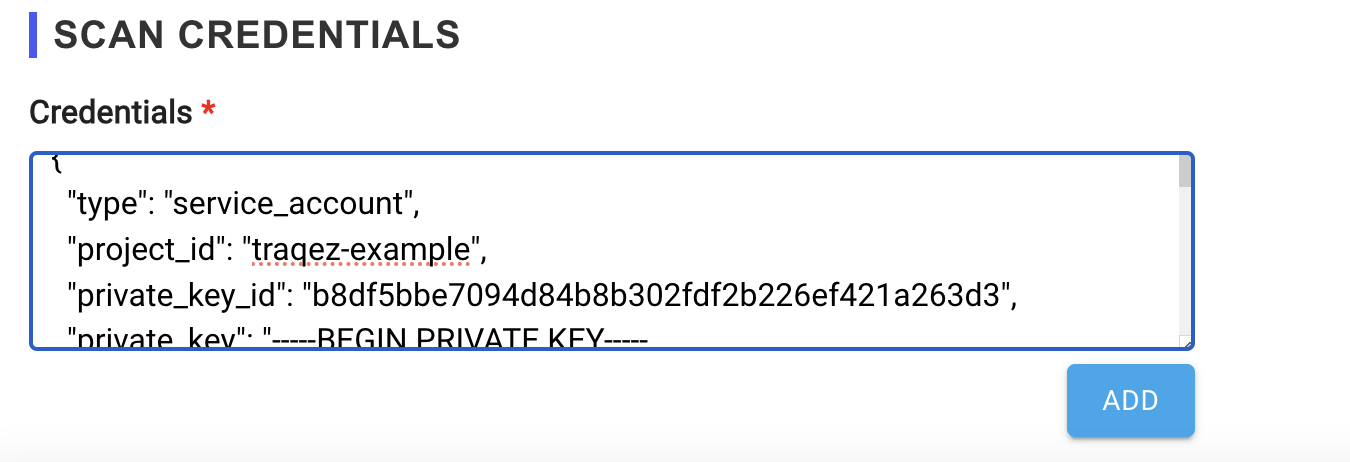
- Fill in the
Scan Credentialssection with the collected information: Open the downloaded JSON credentials file from google console in a Text Editor or VS-Code etc. (You may have to change extension from.jsonto.txtto view it in notepad). Copy the entire JSON contents and paste it into the credentials box.
To view a reference image of scan credentials used, click here to expand.
- Complete the scan credentials configuration.
Supported GCP services for Scan
- compute
- iam
- logging
- dns
- cloudstorage
- bigquery
- apikeys
- kms
- gke
- gcr
- dataproc
- artifacts